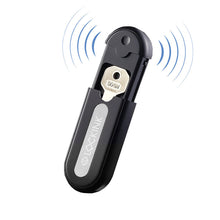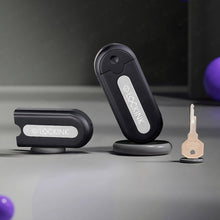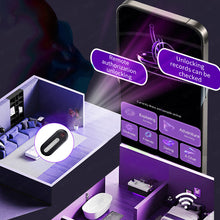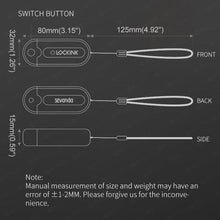
Material: ABS + Metal
Color: Black
Size: Please refer to the picture parameters
Weight: 32g
Package included:
1 PCS Key Vault
1 PCS - Charging Cable
1 PCS - User manual
Chastity Key Box Operation Instructions:
Scan the QR code
below to download the LOCKINK APP
(available for both IOS and Android)

Step 1:
Scan the QR code to download LOCKINK APP.
Open the APP, follow the prompts to complete the registration, press and hold the power button for 2 seconds to turn on the device, the red light will flash after turning on, and it will enter the standby mode; (Figure 1)
then open the APP, click "Not Connected" in the upper right corner to enter the device search interface; (Figure 2)
and click the searched device until the prompt at the bottom is connected successfully.(Figure 3)

Step 2:
The screen jumps to the main page.
The connection is successful in the upper right corner of the page, and the connected key box is displayed in the middle of the screen. (Figure 4)
Click the key box to enter the role binding interface; (Figure 5)
Enter the role selection page, select your role as "Wearer", and after the role is bound, click the "+' sign in the red box in (Figure 6) to add your owner.

Step 3:
If the Master is not linked, the wearer can click the unlock button in the red box in Figure 7 to unlock the device by himself.
If you choose "Master", enter the following page, you can click the "+" sign in the red box to add the Wearer.
After adding, you can control the wearer 's lock permission through the portrait button in the blue box. (Figure 8)

Step 4:
How to add random/manual time lock and position lock; in the role binding interface, click random/manual, adjust the digital time, if you need to execute immediately, click "Immediate effect after setting completed" and click the start button to start the time lock, and the device cannot be unlocked during the time. (Figure 10)
Click the position lock to turn on the position lock, enter the diameter range and confirm. (The owner has no authority to operate the position lock) (Figure 11 & 12)

Step 5:
How to add friends:
1.Click "Message" in the lower right corner (Figure13)
2.then click the "+" sign in the upper right corner of the interface to enter the friend adding interface. (Figure 14)
3. Search for a ID to add him/her as a friend. (Figure 15)

Tips:
If you need to unbind the device or view the unlocking record, you can click the four small square buttons in the upper right corner of the picture below.(Figure 16 & 17)
For more tutorials, please scan the QR code above.


